NoticeNinja Activity Listing Screen:
The Activity
Listing Screen is used to display all the “ACTIVE” Workflows and Tasks. This screen
allows you to view all workflows and drill down to the ones you want to focus
on. Each user can set the default properties on this page to meet their needs.
Click on the Workflow ID to open the workflow detail screen.
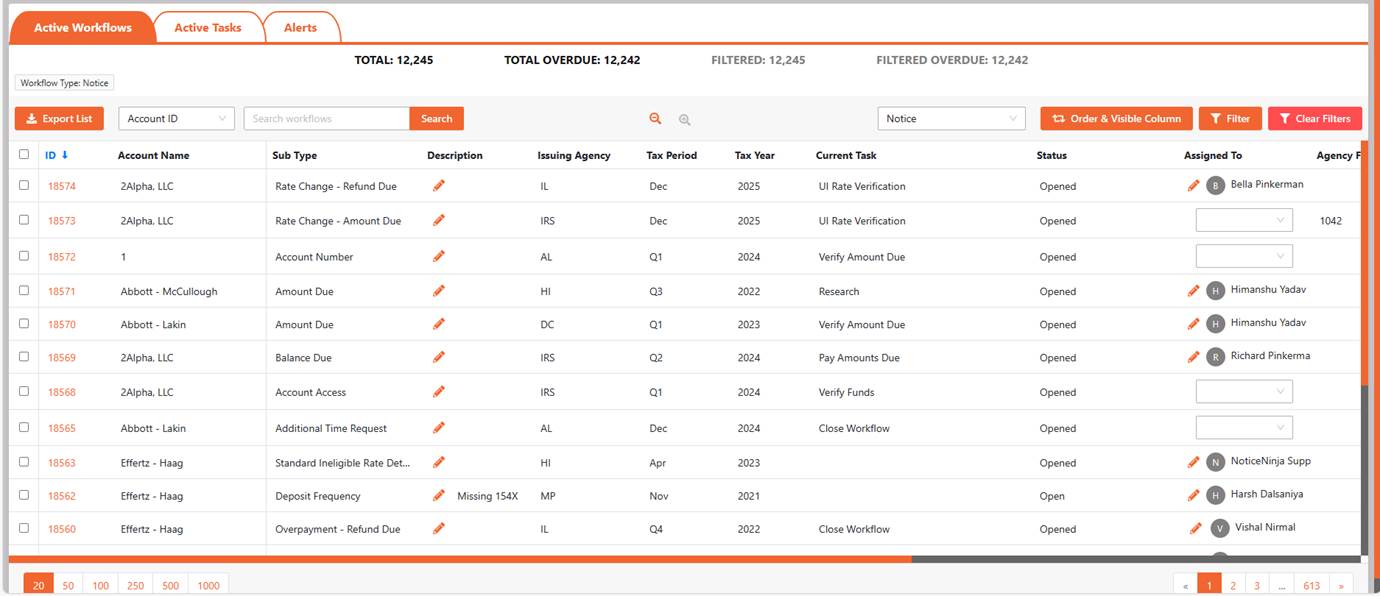
Depending on your Default Screen Settings you will be taken to either the Workflow tab or the Tasks tab when you click on the
Activity Listing link from the main menu.
The Total
number of workflows and overdue workflows are displayed on the top along
with the filtered totals. This allows you to quickly get a count of items that
need attention.

The Workflow
Tab displays the summary details of each workflow. You can scroll right or
left by clicking in the list and using your right/left arrow keys. Click the
workflow ID to open the detail workflow screen.
Each user can control what columns show up on the
screen, what order they are in and can sort the list by any column. You can
also filter the screen to display only the workflows you need to focus on. This
allows each user to configure the screen to their work style and need.
The Export option allows you to export the
full or filtered list. The Search option allows you to search the active
workflows based on the dropdown option selected.
![]()
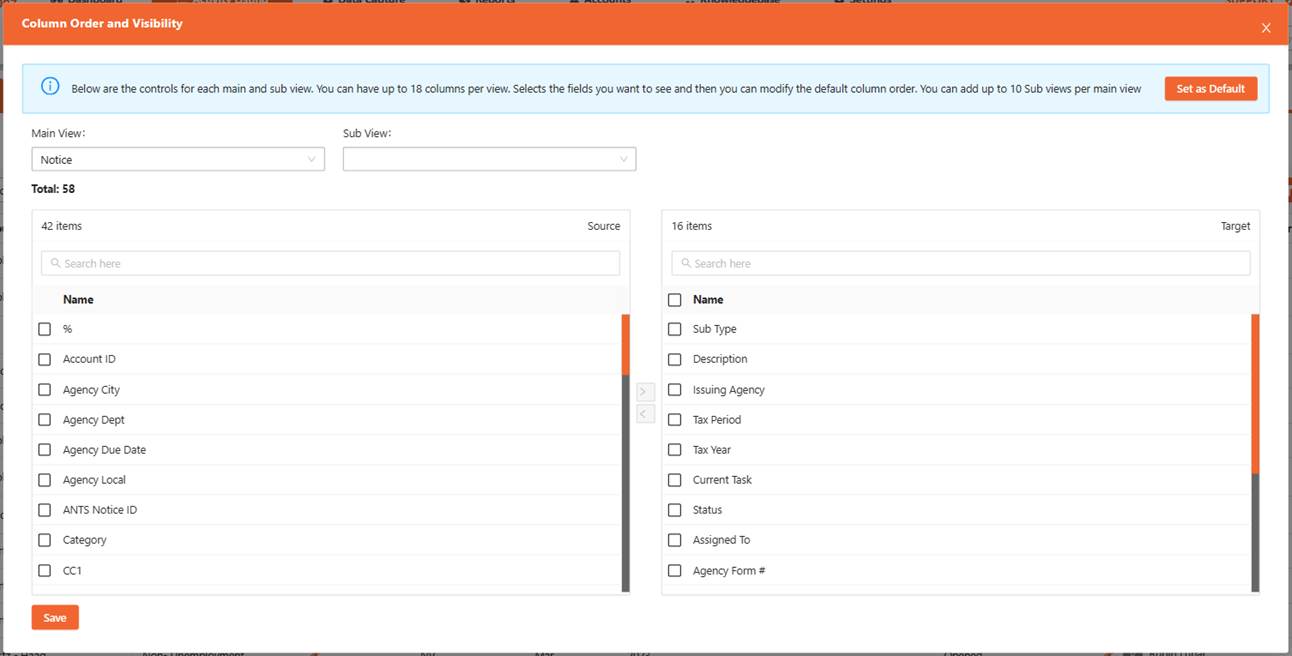
Multiple Views: We added the multiple views to help isolate
the columns needed for each workflow type. This allows you to drill down by
workflow type. Use the All to see all active workflows.
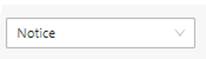
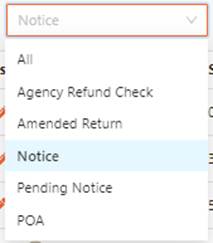
Sub Views: The Sub Views are used to create quick look ups
based on notice data. This gives you the ability to look at the same data a few
different ways to make sure you see it all.

The Order button is used to control the columns
that are available to you. You can uncheck an item to remove it from the list or
drag and drop the item to a new location to re-order the columns. This allows
users to only display relevant information to them based on the workflows they
are assigned.
The Order & Visible Columns / Filters are displayed below the totals
section.
Configure
a View or Sub View:
Each view
can be modified to meet the user’s needs. There is a limit of 18 column headers
in each view and or sub view.
1.
On
the left side put a check in the box for the fields you want listed in the
view.
2.
Click
the Right Arrow button to move the fields to the right side.
3.
You
can order the columns by dragging and dropping the field where you want it to
be. You can also you the arrow button to move them up and down.
4.
Once
done click the save button to save your changes and go back to the activity
listing screen to see how the new view looks. You can make changes to the sub
view as needed.
5.
Set
as Default: Once the Sub view is configured you can set it as the Default view
for all users when using the sub view.
6.
Filters:
You can add filters to sub views so the next time you use the sub view it
already has the pre-defined filters.
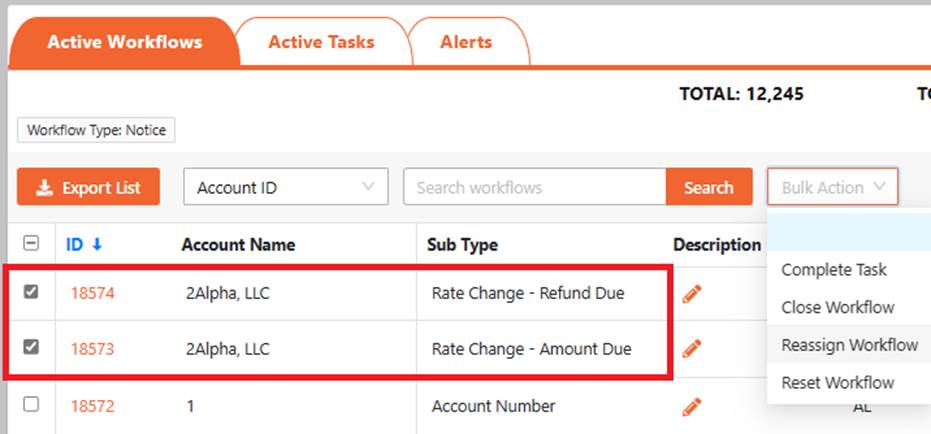
Bulk Actions: Allows you to Complete the current task of the
selected notices or complete the whole notice for the selected notices. If
completing the notice is will skip any unopen or completed tasks for each
notice.
Select the workflows and then use the Bulk actions
dropdown to select what bulk action you want to take. The notes will be on all
workflows that the task or workflow was completed by the bulk action.
NOTE: You must be on an individual workflow view or sub
view for the boxes to show.
At the bottom of the page, you can increase the
number of items listed and move to the next page if more listed than the max
page count.
![]()
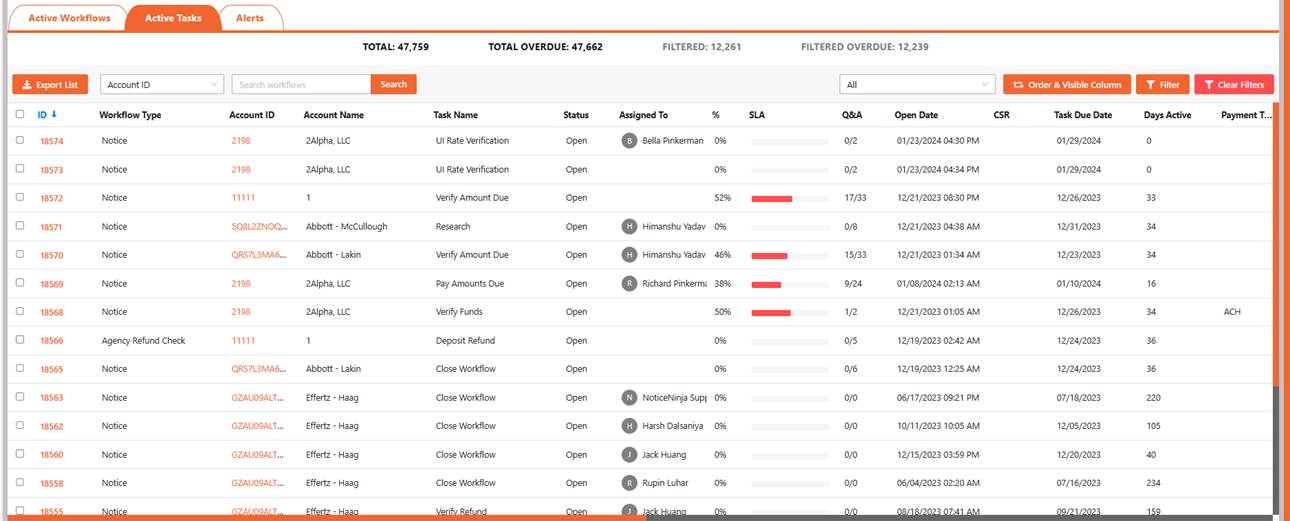
The Tasks
Tab is used to display all of the “ACTIVE” tasks within the system. You can
modify the columns and filter this screen just like the workflow tab. This
allows each user to set the screen to display the data they need to work on.
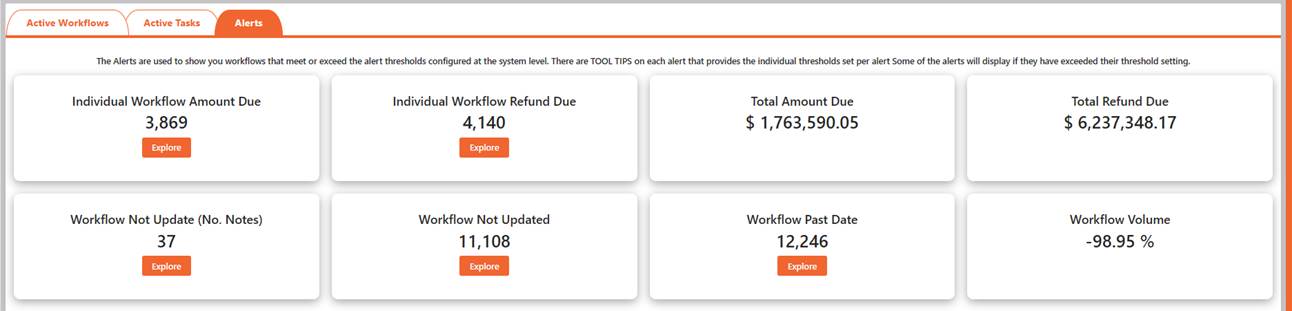
The Alerts
Tab is used to display all the Alerts that have been triggered. At this
time the alerts are based on Agency Due Date. If the notice goes past the
Agency Due date it will show up on the list. You can modify the agency due date
from the Edit workflow option.
Navigation Tips:
NoticeNinja uses a series of Modules and
Screens that control the display of the data held in the system. Each Screen
holds specific information (Account, Workflows & Tasks, Knowledgebase, ,
Reports, and System Setup) pertaining to the screen title, organized in a
general layout. The navigation bar on the top of the screen will tell you where
you are at all times. To go back to the previous screen, you were on click the
menu item from the top of the screen.
![]() To open
any “Module” (Account, Workflows & Tasks, Knowledgebase, , Reports, and
System Setup) click on the Icon/Description. Once in each Module Screen there
are options you can choose from (Tabs, Line Items, Reports, and Workflows).
Some links open New Screens to display the related data. There are two
navigation options, either use your mouse (Point and Click) or use the keyboard
(Tab, Up/Down Arrows, and Enter) keys.
To open
any “Module” (Account, Workflows & Tasks, Knowledgebase, , Reports, and
System Setup) click on the Icon/Description. Once in each Module Screen there
are options you can choose from (Tabs, Line Items, Reports, and Workflows).
Some links open New Screens to display the related data. There are two
navigation options, either use your mouse (Point and Click) or use the keyboard
(Tab, Up/Down Arrows, and Enter) keys.
Keyboard
Navigation Only
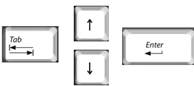 Throughout
NoticeNinja you can
use your (Tab, Up / Down
Arrow and Enter) keys to
navigate throughout the system. (Tab) moves to the next Module or Field to the
right. Use the Up/Down Arrow to make drop down selections. (Enter) will open or
commit your selection.
Throughout
NoticeNinja you can
use your (Tab, Up / Down
Arrow and Enter) keys to
navigate throughout the system. (Tab) moves to the next Module or Field to the
right. Use the Up/Down Arrow to make drop down selections. (Enter) will open or
commit your selection.
NoticeNinja [ 1001 Tampa FL
2024 – 2027 NoticeNinja. All rights reserved.