My
Company Info:
This
screen is where all your company’s information is stored. Some of the data
shows up on the template letters, and throughout NOTICENINJA. This data is only available to Managers and Admins users
for security reasons. You can control all your instance settings from this
settings screen. You can access all the sub tabs that control
all the options throughout the system. If you’re not sure about what a setting
does click the (i) or the Help icon on the top of each page.
Settings
Home Screen: My Company Info Tab
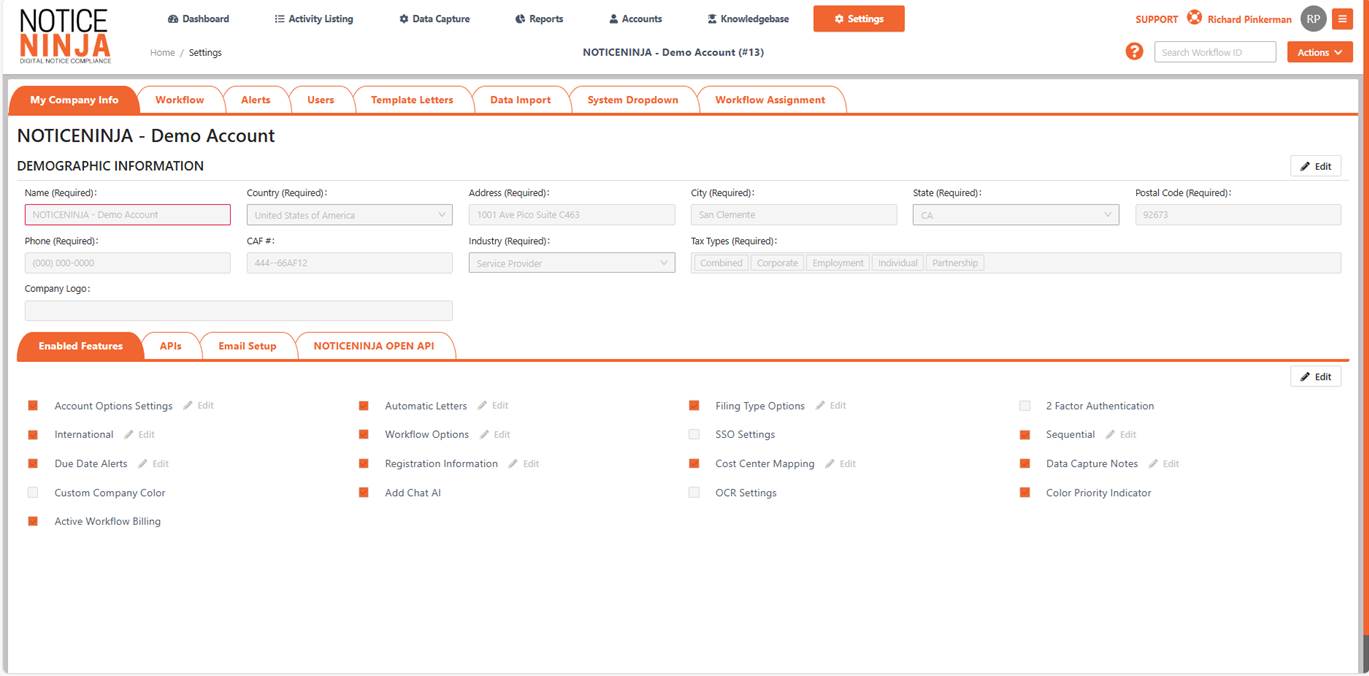
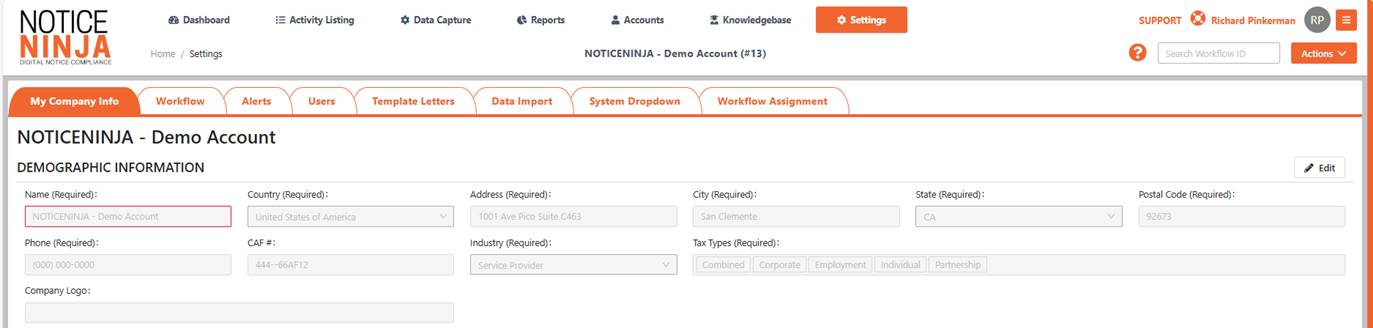
Demographic
Information:
Used
to hold your company’s name, address, phone, and fax numbers. Also holds your
Email setup, and your system Info, including your company’s logo. (*The logo is
used for internal purposes and is not used in any marketing or sales
activities.) The logo will go on the template letters you setup to send out to
clients and or Agency agents.
*This
information should rarely be changed.
ENABLED
FEATURES:
This
section holds your accounts settings. Each option is used to further configure
the system to meet your individual needs. Some of the settings require a password
to edit, contact support to help get those configured.
Account Settings: Manage how your account information
is displayed and customized.
Automated Letters: Control whether automated letters
are sent to clients for updates on notices.
Filing Types: Set which filing types users can
see.
2-Factor Authentication (2FA): Enable 2FA for added security on
your account. Note: Ensure all phone numbers are in international
format.
Countries Managed: Control the number of countries you
receive notices from.
Workflows: Manage which workflows are visible
to users.
SSO Setup: Set up Single Sign-On (SSO) for
your account.
Important: IT department assistance required.
See Help File for details. Help
File
Sequential Notices: Configure how sequential notices
are tracked, including task and workflow assignments.
Due Date Alerts: Set up email alerts for upcoming
due dates.
Registered Agent Info: Store your Registered Agent
information.
Cost Center Labels: Control the labels used for cost
centers at the account level.
Data Capture Notes: Add notes, default settings, and
other configurations for the Optical Character Recognition (OCR) screen.
OCR Settings: Set up automatic synchronization
for OCR when notice accuracy reaches 90% or higher.
Company Color: Customize the system color scheme
to match your company's logo and branding.
Chat AI: Enable or disable user access to a
chat interface for asking questions.
Workflow Billing: Activate workflow billing for
service providers who want to bill clients.
API’s
This
section holds the API’s into 3rd party systems. If you need to set
up one of the API contacts support to send over the policy for adding API’s to
your account.

Didi-Signer
Settings: Used for E-Signatures, contact support to get this setup.
DocuSign
Settings: Used for E-Signatures, contact support to get this setup.
Salesforce
Settings: API used to sync case data back and forth.
Zendesk
Settings: API used to sync case data back and forth.
Master
Tax Settings: Used to set up the Master Tax API to
sync account level data.
Yardi
Settings: Used to send data over to Yardi account for AP data.
E-MAIL
AUTO REPLY SETTINGS:
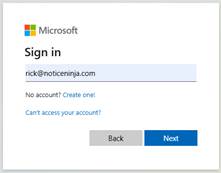
In
this section you can set up the Corporate Shared Email account. This account
can be used by (Send on behalf of) other users that have access to send out
emails from the system. To setup the individual user emails use the User
Profile Settings.
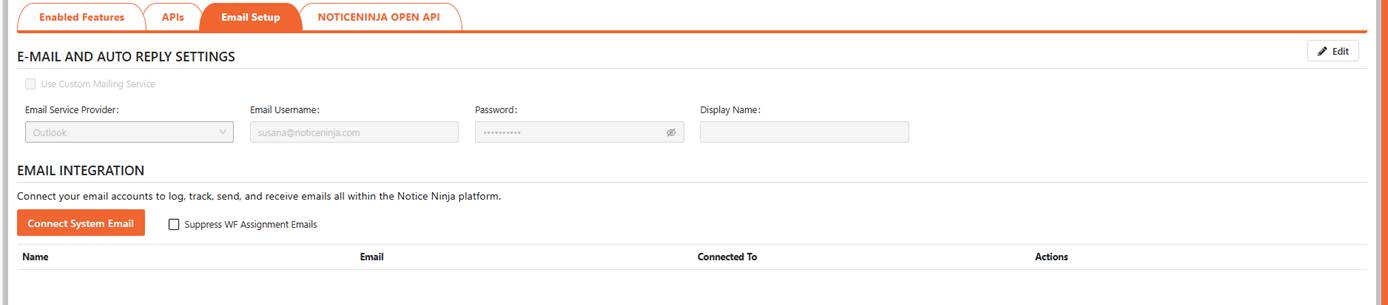
Use Custom Mail Service: Used to override the default SMTP email used when no
email is setup info@noticeninja.com
as the sending email.
Email Server Name:
Put in your company’s SMTP email server name. The setting is used to allow NOTICENINJA to send e-mails out of the system.
Email User Name:
Use this if your mail is tired to an account.
Email Password:
Enter the password to the user.
Port Number:
This is the port number used to send out mail.
Display
Name: Used to modify the display name on the e-mail.
SSL / TLS:
Use this if your mail system requires a SSL connection.
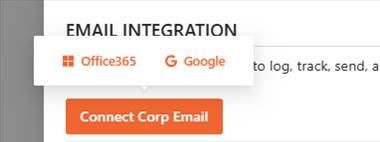
Select
the email client that your organization uses.
ENDPOINT
API
Open Endpoint API that provides clients with programmatic access to their tax
data. This means clients can leverage software applications to interact with NOTICENINJA data directly, automating tasks and streamlining workflows.
If you want to get the
Endpoint API setup contact support.

Navigation Tips:
NOTICENINJA uses a series of Modules and Screens that
control the display of the data held in the system. Each Screen holds specific
information (Account, Workflows & Tasks, Knowledgebase, , Reports, and
System Setup) pertaining to the screen title, organized in a general layout.
The navigation bar on the top of the screen will tell you where you are at all
times. To go back to the previous screen, you were on click the menu item from
the top of the screen.
![]() To open
any “Module” (Account, Workflows & Tasks, Knowledgebase, , Reports, and
System Setup) click on the Icon/Description. Once in each Module Screen there
are options you can choose from (Tabs, Line Items, Reports, and Workflows).
Some links open New Screens to display the related data. There are two
navigation options, either use your mouse (Point and Click) or use the keyboard
(Tab, Up/Down Arrows, and Enter) keys.
To open
any “Module” (Account, Workflows & Tasks, Knowledgebase, , Reports, and
System Setup) click on the Icon/Description. Once in each Module Screen there
are options you can choose from (Tabs, Line Items, Reports, and Workflows).
Some links open New Screens to display the related data. There are two
navigation options, either use your mouse (Point and Click) or use the keyboard
(Tab, Up/Down Arrows, and Enter) keys.
Keyboard
Navigation Only
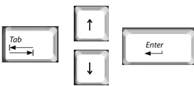 Throughout
NOTICENINJA you can
use your (Tab, Up / Down
Arrow and Enter) keys to
navigate throughout the system. (Tab) moves to the next Module or Field to the
right. Use the Up/Down Arrow to make drop down selections. (Enter) will open or
commit your selection.
Throughout
NOTICENINJA you can
use your (Tab, Up / Down
Arrow and Enter) keys to
navigate throughout the system. (Tab) moves to the next Module or Field to the
right. Use the Up/Down Arrow to make drop down selections. (Enter) will open or
commit your selection.
NOTICNINJA [
Tampa, FL
©20242 – 2026 All rights reserved.